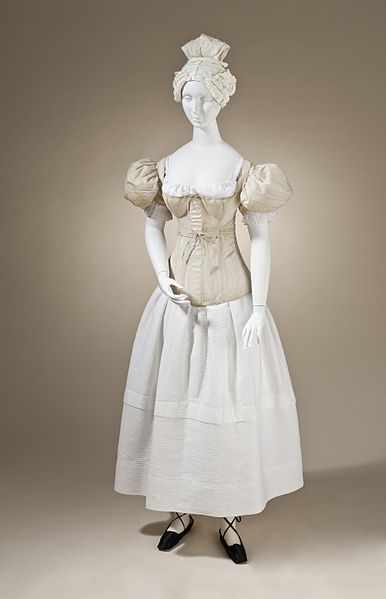
Well, we all know why these petticoats were needed, and one of the reasons was, of course, to hold the shape of the actual dress. The petticoats were made of cotton, linen, sometimes even flannel and were, of course, starched. During the course of the 19th century the shape and general look of petticoats were changing. For the period in question, i.e. 1830s, they were bell shaped, gathered around the waist and usually had a number of tucks which were supposed to help with stiffening it and also make walking easier.
Ladies wore somewhere between three and six (!!) petticoats at a time.
I decided that two petticoats would be enough for a doll otherwise the waist area would become too bulky. Also, I placed these petticoats on difference levels (the first one being lower than the second one). I made both of them in a similar way. Both are 100% hand stitched, of course.
For the first petticoat I chose unbleached cotton, for the second one – quite thick white cotton fabric. I decided not to starch petticoats as the fabric is quite thick already.
I took the measurements of the doll on top of the corset. The waist circumference is 20 cm. The length of a skirt should be 37-38 cm.
So, I cut out straight pieces of fabric: 80 cm x 43 cm for the first petticoat and 85 cm x 60 cm for the second one. The basic idea is that a petticoat is never as wide as the main skirt, so every next petticoat is getting a bit wider (and the main skirt in this case will be 90 cm wide).
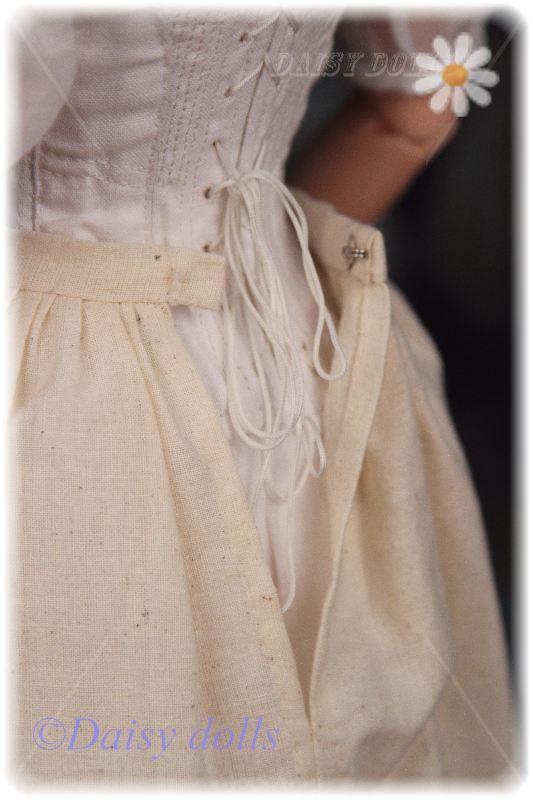
I also cut two small strips of fabric (about 23 x 4 cm) for the belts. For the lower petticoat the belt would be 21 cm long, for the second one – that would sit a bit higher on the waist – it is 20.5 cm.
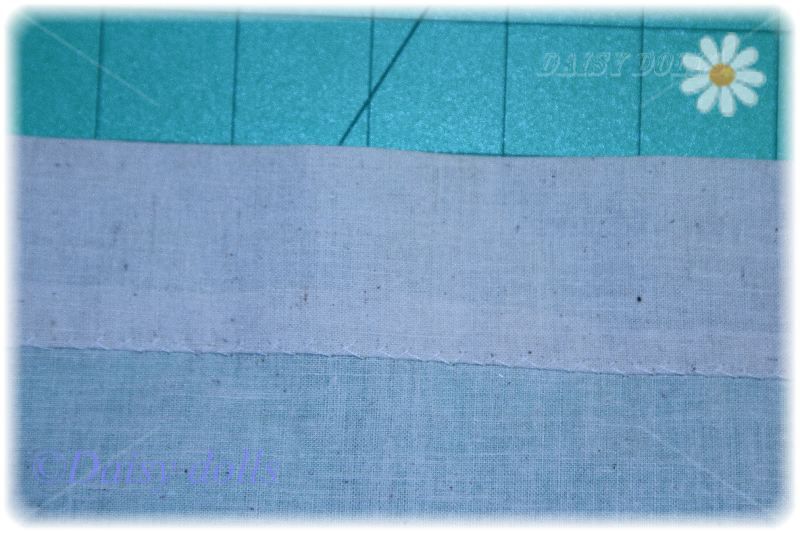
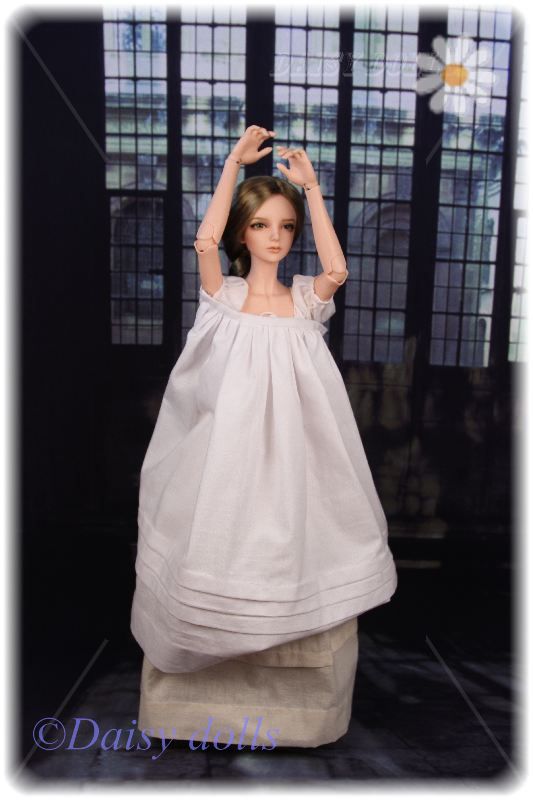
I started by folding the hem inside and stitching it with an catch stitch. The hem is supposed to be quite wide. Mine is 4 cm (+1 cm tucked inside).
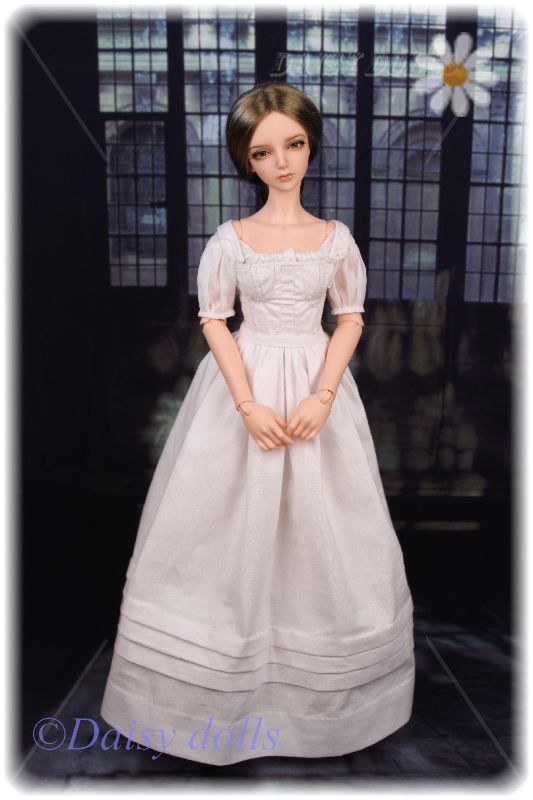
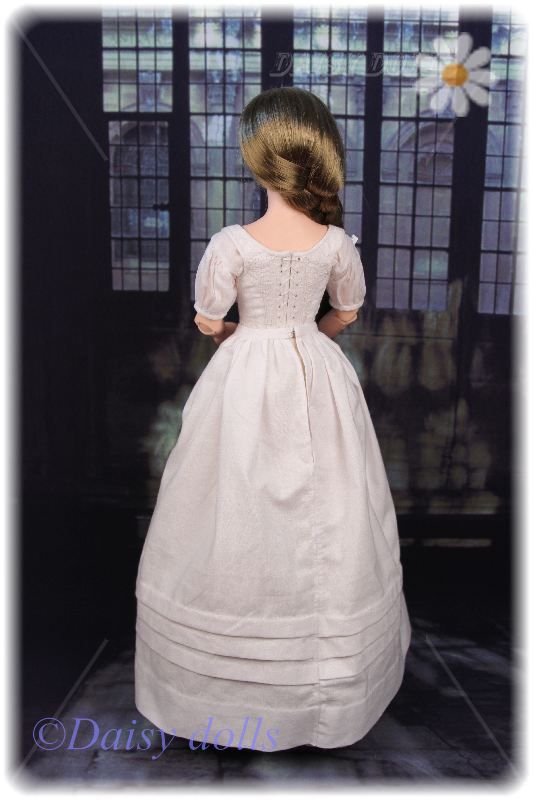
Next, I did one tuck for the first petticoat and three for the second one. Each tuck is 1.5 cm wide.

Then I stitched the back seam, gathered the pleats at waist, stitched the belt on, rolled it over and stitched it to the inside. The last step was to sew on a hook.
And here is the result – both petticoats on Jane.
The first petticoat.
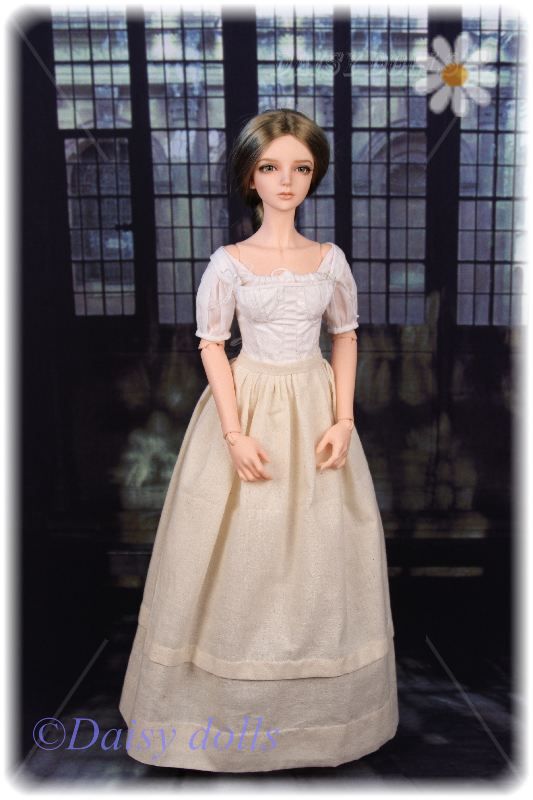
The second petticoat.
More photographs are in the gallery below:


Beautiful! If I saw this picture somewhere else I would think she is already dressed up! Everything looks so perfect! (Can’t even imagine making this endless folds by hand!Must be so boring!)
Sviatlana, thanks a lot! Yes, those tuck were rather boring. On the second tuck of the second petticoat I was even considering to give up and use a sewing machine, but… still finished it by hand. And now have a sense of some achievement!
Таня, спасибо большое! Шью сейчас непосредственно платье. Скажу я тебе, белье шить намного легче! Там ткань тоньше и белая. А черную шерсть шить приходится почти вслепую.
ООО! Мне тоже кажется, что это уже и есть костюм Уже так красиво!!!
Оля, и правда, уже красиво, даже не хочется прятать под верхним платьем 🙂
Оля, красота!!! Действительно выглядит как уже законченный костюм. Такое себе домашнее платьишко. Интерсно, для чего на юбке делали эти защипы? У меня есть одно предположение, но так ли оно верно? Мне кажется они кроили из одного куска ткани, а ширина полотна и была высотой юбки и этими защипами они её убирали. А ты нигде не нашла объяснение?
Марина, спасибо большое! Ой, это точно, прятать жалко, но НАДО!
Таня, спасибо большое!! Защипы делали, чтобы юбки не путались в ногах. Например, у меня в книге одной есть фотография юбки из фланели (красной, кстати!), так вот там три очень широких защипа и средний из них приходится на уровень коленей. Т.е. они как бы утяжеляют юбку и ее легче отпинывать при ходьбе. Кроме того, они уплотняют низ юбок, и поэтому они дают объем (а не висят вниз). К 1850-м годам защипы стали мельче, но их было больше, и в них часто вставляли шнуры – с той же целью, чтобы юбка отставала от ног. Ну а в середине 1850х был изобретен кринолин (если задуматься, это по сути те же защипы со вставленными в них металлическими прутьями), и многочисленные нижние юбки стали не нужны (там обычно была одна нижняя юбка поверх корсета).
Оленька, очень красиво и по-настоящему!!! И спасибо за просвещение огромное!!!!!!!!!
Леночка, спасибо огромное! Может, ты тоже когда решишься что-то подобное на своих красавиц сшить?
То, что Вы сейчас показываете, конечно, это – шедевр! Я – просто наблюдающий за этим сайтом, не имею права на комментарии! Но для меня это сравнимо с полетом в космос!!!
Александр, спасибо большое! 🙂
Оля, как интересно, очень остроумное решение. О том, что подол платья подшивался руло – валиком, в который вшита вата, позволявшая юбке стоять колокольчиком, я вычитала у Захаржевской в истории костюма. А о том, что похожий прием, только без ваты, применялся в нижних юбках я даже не знала. Спасибо.
Таня, на самом деле, удивительно, насколько продуманными были наряды прошлых веков. Слоев было много, но зато некоторые изобретения были просто гениальными. Про вату в подоле платья у более ранних платьев (в 1820-х) я тоже видела – в моих книгах по костюму. Кстати, я вчера опубликовала список книг, которые помогают мне с моими историческими проектами (под-меню “Библиография” в разделе “Ссылки”).